Azure Files Connection
When adding an Azure Files action, select an existing connection or create a new one.
Flow supports two connection methods:
- Connection String and Share Name
- SAS URI for Share
Connection properties
| Name | Description |
|---|---|
| Name | A custom label for this connection. This name will appear when selecting the connection in a Flow action. |
| Connection Type | Choose how you want to authenticate with Azure Files. Two options are available: • Connection String and Share Name – Uses a full Azure Storage connection string and the name of a specific file share. • SAS URI for Share – Uses a full SAS URI pointing directly to a specific file share. |
| Default Directory (optional) | Allows you to restrict the scope of the connection to a specific root directory. This directory must already exist in the share. Actions using this connection will be limited to this directory and its subfolders. |
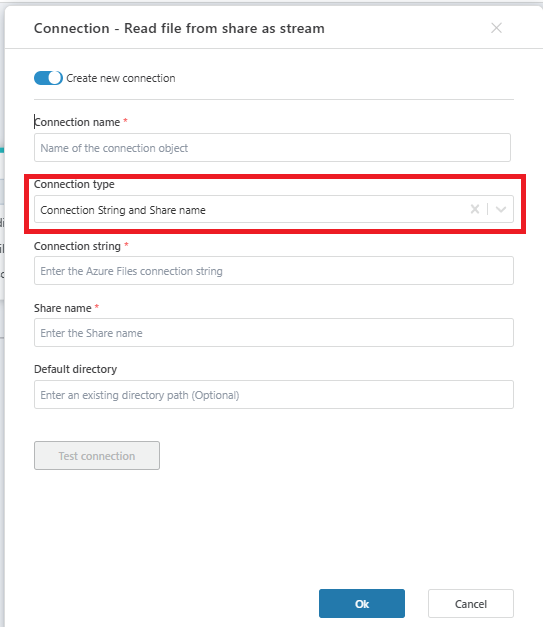
Connection String and Share Name
Use this option to connect using the Azure Storage account connection string and specify a file share name.
| Name | Description |
|---|---|
| Connection String | The full connection string for the Azure Storage account. You can find this in the Azure Portal under Storage Account → Access Keys. |
| Share Name | The name of the Azure File Share you want to access (e.g., project-documents). Must already exist under the storage account. |
Note
If you use an account key in the connection string, you're granting access to all file shares in the storage account. For improved security, consider using a SAS token in the connection string instead.
Get the Connection String
- Go to the Azure Portal.
- Navigate to Storage accounts.
- Select your storage account.
- In the left menu, under Security + networking, click Access keys.
- You'll see two connection strings (Key1 and Key2) – either one works.
- Copy the value under Connection string.
Example:
DefaultEndpointsProtocol=https;AccountName=mystorageaccount;AccountKey=abcd1234...;EndpointSuffix=core.windows.net
Get the Share Name
- In the same storage account, go to File shares (under Data storage).
- Choose or create a file share (e.g.,
project-files). - The name you see here is the Share Name.
Example (using account key)
DefaultEndpointsProtocol=https;AccountName=mystorageaccount;AccountKey=abcd1234...;EndpointSuffix=core.windows.net
Example (recommended – using SAS token)
DefaultEndpointsProtocol=https;AccountName=mystorageaccount;SharedAccessSignature=sv=2022-11-02&ss=f&srt=sco&sp=rwdlac&se=2025-08-01T00:00:00Z&st=2025-07-21T00:00:00Z&spr=https&sig=xyz...;EndpointSuffix=core.windows.net
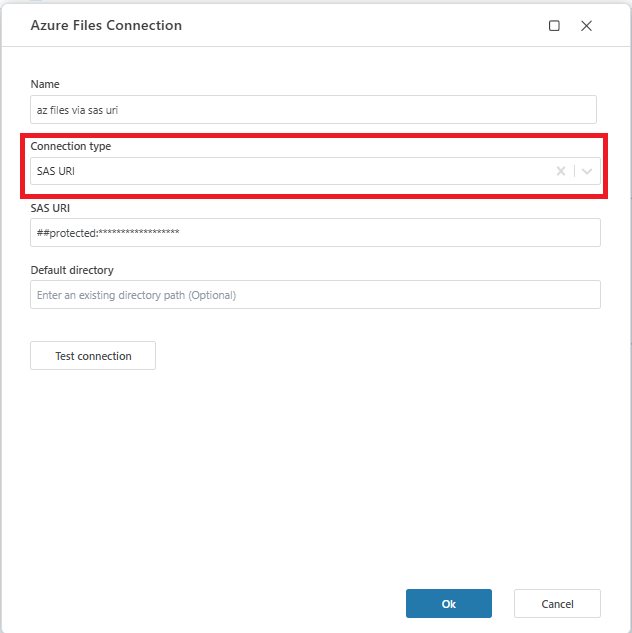
SAS URI for Share
Use this method to connect using a full SAS URI for a specific Azure File Share. This is the most secure and scoped method.
| Name | Description |
|---|---|
| SAS URI | A valid SAS URI pointing to the Azure File Share. This URI includes permissions, expiration date, and access token. You can generate this in the Azure Portal under Storage Account → File Shares → [Your Share] → Generate SAS. |
Generate a SAS URI for a specific file share
- Go to Storage accounts in the Azure Portal.
- Select your storage account.
- In the left panel, go to File shares.
- Click the share you want to connect to.
- On the top menu, click Generate SAS.
- Choose the permissions (Read, Write, Delete, List, etc.).
- Set the start and expiry date/time.
- Click Generate SAS token and URL.
- Copy the SAS URL at the bottom – this is your SAS URI.
Example:
https://mystorageaccount.file.core.windows.net/myshare?sv=2022-11-02&ss=f&srt=sco&sp=rwdl&se=2025-08-01T00:00:00Z&st=2025-07-21T00:00:00Z&spr=https&sig=xyz...
Example:
https://mystorageaccount.file.core.windows.net/myshare?sas_token=sv=2022-11-02&ss=f&...
Mounting an Azure File Share Locally
You can also map an Azure File Share to a local drive letter on your Windows machine. This can be useful for troubleshooting, local access, or manual file management.
For step-by-step instructions, including how to use UNC paths, refer to the official guide:
Mount Azure Files on Windows