MCP Server Settings
To enable MCP Clients to use OAuth authorization to Flow MCP Server APIs, you need to configure the MCP Server Settings for your tenant.
For example, if you try to use the OAuth endpoint of an MCP Trigger without configuring the MCP Server Settings, you will get an unauthorized error response from the API.
Get started - use default Authorization Server
The quickest way to enable OAuth for Flow MCP Server APIs is to use the Authorization Server associated with your Flow instance, which is Microsoft Entra ID.
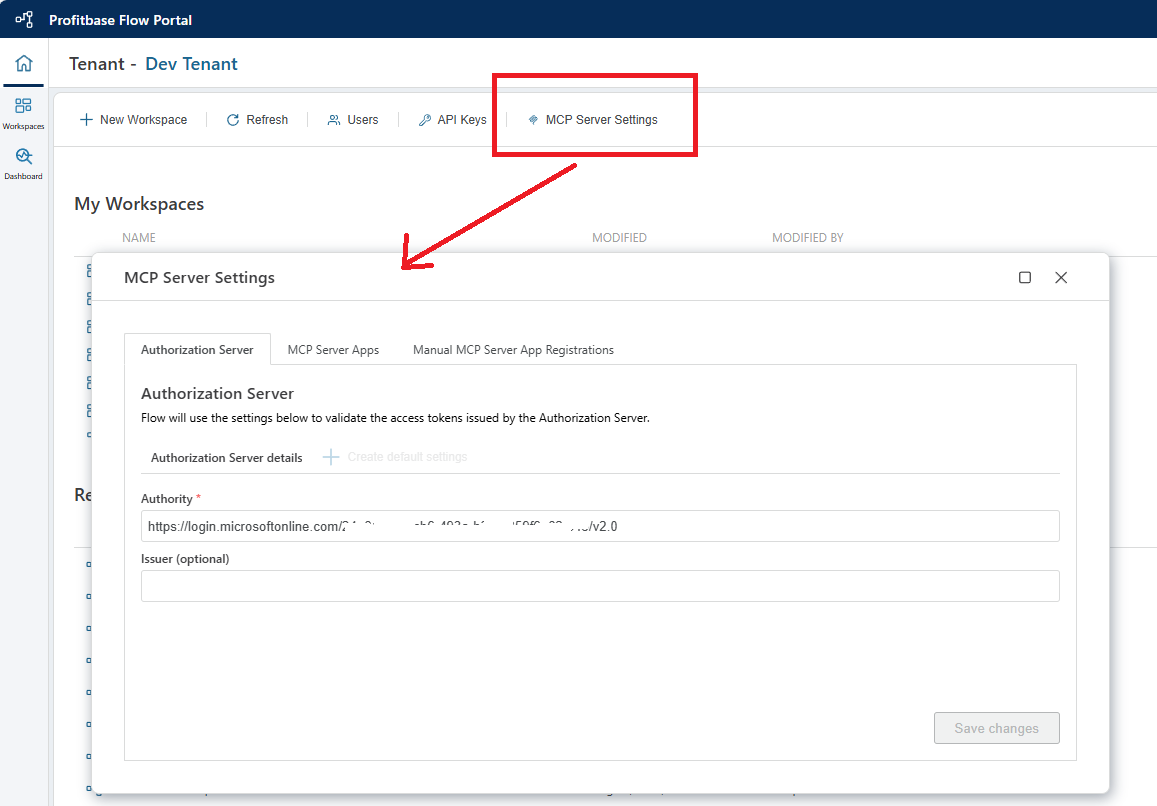
- In the
MCP Server Settingswindow, select theAuthorization Servertab. - Click
Create default settings. This will enable OAuth authorization for your tenant. The Authority property should now contain something likehttps://login.microsoftonline.com/GUID/v2.0 - Based on whether you're a SaaS customer, or self-hosting the solution, do one of the following:
3.1. If you're an SaaS customer, select theMCP Server Appstab and clickCreate application. This will create a Client ID and Client Secret that you can use in external apps to (programatically) request an access token from Entra ID.
3.2. If you're running Flow on-premises, you need to talk to your Azure admin and have them create an Entra App Registration for you. Then, select theManual MCP Server App Registrationstab and add the application to the list by providing theClient ID.
Note
Currently, Microsoft Entra ID does not support Dynamic Client Registration. This means that you have to obtain an access token (using the Client Credentials flow) from Entra ID before calling the Flow MCP Server endpoint. If you want to use the Flow MCP capabilities in a client that only support Dynamic Client Registration, you need to use your own Autorization Server instead (like explained below.)
Use your own Authorization Server
If you want to use your own Authorization Server (for example Keycloak, Auth0 or Scalekit) which supports Dynamic Client Registration, or you want to use your own Entra ID instance to do authorization, do the following:
- In the
MCP Server Settingswindow, select theAuthorization Servertab. - Enter the address of your Authorization Server in the
Authorityfield (remember tosavethe changes). - Optional: You don't need to do this if your Authorization Server supports Dynamic Client Registration.
Select theManual MCP Server App Registrationstab, and add the Applications from your custom Authorization Server. (You need to create Applications in your Authorization Server before performing this step.)