Creating Schema
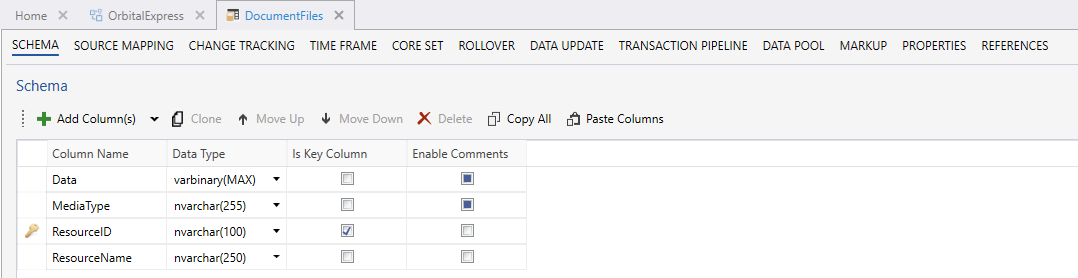
Creating Data Store Schema
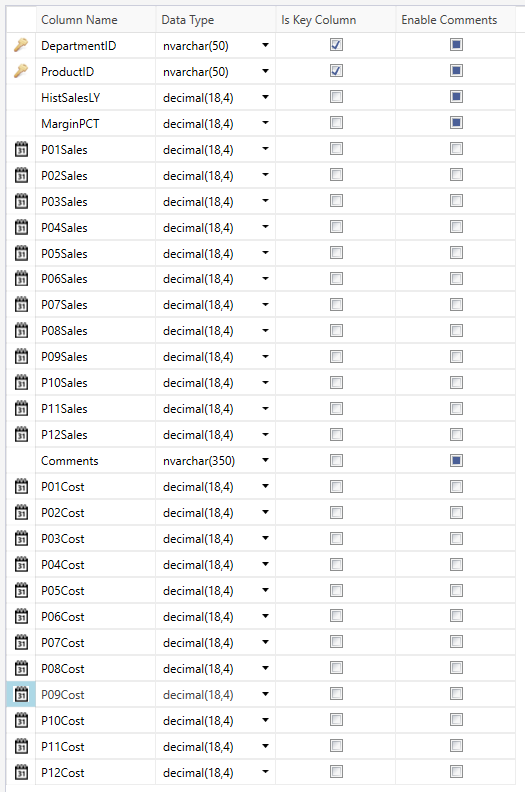
Our Product Sales data store will consist of these columns:
- DepartmentID – Nvarchar(50)
- ProductID – Nvarchar(50)
- HistSalesLY – Decimal(18,4)
- MarginPCT – Decimal(18,4)
- P01Sales- P12 Sales – Decimal(18,4)
- Comments – Nvarchar(350)
- P01Cost – P12Cost – Decimal(18,4)
DepartmentID and ProductID are key columns. This is indicated with key symbol left of the column name. The columns P01Sales to P12Sales and P01Cost to P12Cost are timeframe columns. This is indicated with small calendar symbol.
- Use the “add column” button to add the columns DepartmentID, ProductID, HistSalesLY and MarginPCT.
- Name them and give them the correct datatype.
- Remember to check of “Is Key Column” for DepartmentID and ProductID.
- Click “Save” or Ctrl + S.
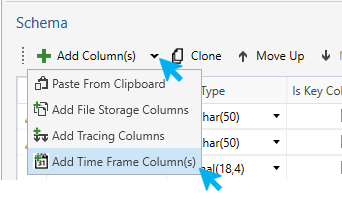
- Click the small “Arrow” on the “Add Column(s)” button and select “Add Time Frame Column(s)”, as shown by image below:
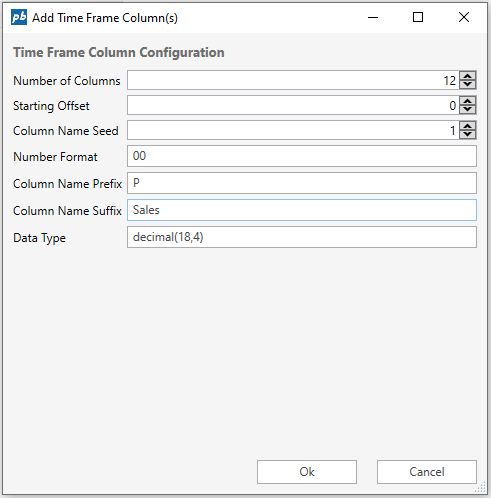
- Makes sure the “Add Time Frame Column(s)” pop up is filed out like this:
- Add the column Comments. You will see that there are no data type Nvarchar(350) in the dropdown menu. Use the Nvarchar(50) data type and edit the number of characters from 50 to 350 by double clicking on the respective cell.
- Repeat step 5 and 6 but this time changes “Column Name Sufix” to “Cost” instead of “Sales”.
- Click “Save” or Ctrl + S.
Your Schema should look like this:
- Go to the “Time Frame” tab and check off the “Inherit from ancestor” checkbox.
Your time frame columns now represent each month from the reference date in the storegroup and 12 months forward. The offset represents how many resolutions (months in this case) from the reference date the column represents. This configuration is used to create a date for the transactions originating from each column through a pipeline in a later stage.
Check out how to Mapp the Source Here.