Dimensions
Dimensions allow you to define hierarchical data structures that can be used for filtering and reporting, both within Hypergene InVision and in third-party tools like Power BI. They can have multiple levels, each with an ID, name, and optional translations for different languages. Additionally, dimensions can include properties, which represent attributes of dimension members, such as weight, color, or length.
Dimensions are always stored as wide tables in the database, but you can edit them as parent-child hierarchies in the dimension editor.
Each level in the dimension is represented by at least two columns in the wide table – an Id and a Name column. The Id column contains the id of the dimension member, and the Name column contains the text displayed to the user. If you enable language support, there will be a Name column for each language.
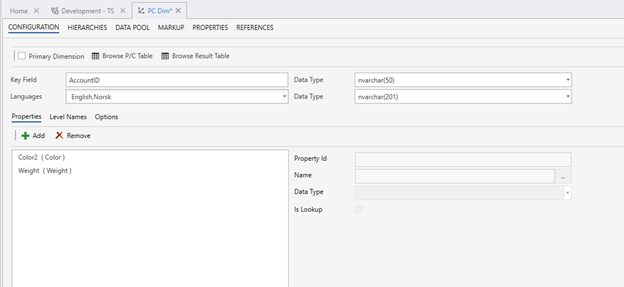
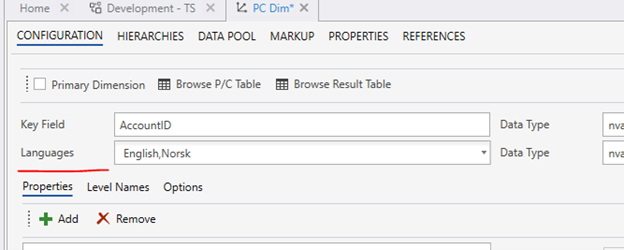
Key Field specifies the name of leaf level column, for example ProductID or AccountID.
The example below shows the columns in a table for a two-level dimension (L1 and ProductID), having “ProductID” as Key Id, translations for English and Norwegian (EN and NO), and a Weight property. The table includes a SortIndex column that specifies how siblings are sorted (not shown in the example below).

How to create a dimension
- Start the Designer and open a Solution.
- In the Solution Explorer, right-click a Folder and choose “Add Item”, then choose “Dimension” from the list.
- Provide a name for the Key Field. The Key Field specifies the name of the column at the leaf (lowest) level of the wide table.
Enable support for multiple languages
If you want to enable the dimension to support different languages for displaying members, select one or more languages in the Languages dropdown. The language-specific names for each dimension member are managed in the Dimension Editor.
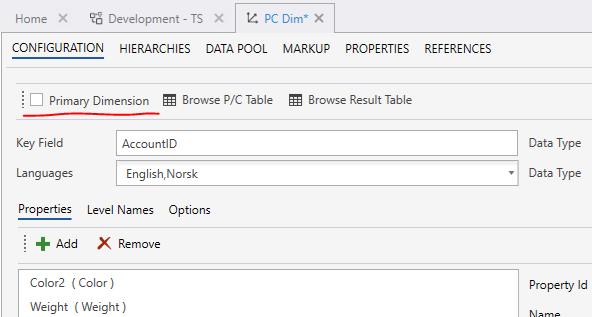
Primary Dimension
Specifying a dimension as a Primary Dimension means that it appears in the list of "primary dimensions" in the Dimension Editor without users first having to select a specific Solution.
That gives Power users a central repository of dimensions they can edit and publish to Work Process Versions or other solutions.
Think of primary dimensions as a central repository of dimensions that can be modified and published into production.
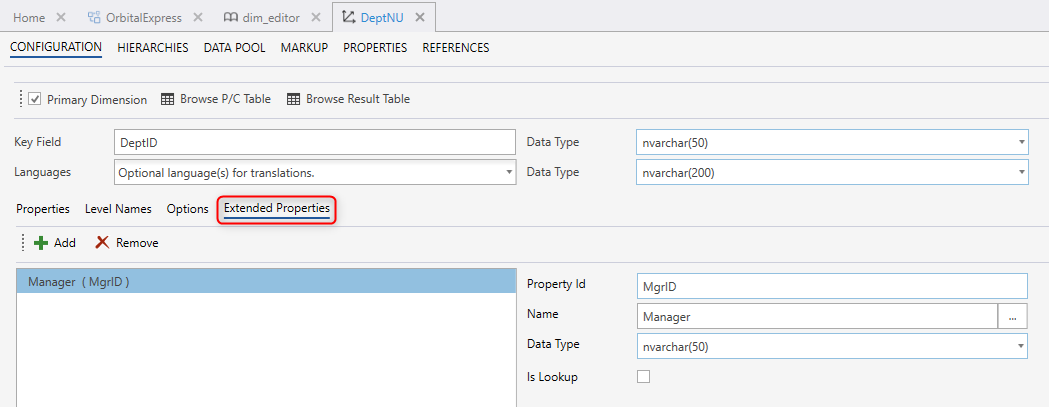
Properties
Dimension members can have zero or more properties. For example, products in a Product dimension can have properties such as weight, height, color, etc. Each property is materialized as a column in the dimension table.
Property Id
This is the Id of the property field and the name of the column in the dimension table in the database.
Name
Name specifies the label of the property in the Dimension Editor user interface. You can also provide specific translations for the label using this field.
Data type
Specifies the data type of the property.
Is Lookup
Use this feature if you want users to select from a set of predefined values when setting the value of the property.
Level names
By default, column names for all levels except the leaf level are auto-generated using the format L[level number], for example, L1, L2. If you want to override the naming for each level column, you can specify this in the Level Names list.
Options / Empty member
If you need the dimension to always contain an empty member, enable the Include Empty Member option.
This option is typically used when you are using the dimension as a source for a dropdown in a spreadsheet, and users must be able to select a “null” or “not applicable” value.
Options / Composition
Go to Dimension composition.
Options / After publish
Go to After publish.
Extension properties
Extension properties enable partners and customers to extend dimensions in installed Packages (for example, Planner) with custom properties. That makes it possible to use standard dimensions for custom Power BI reporting or EPM custom extensions.
Custom properties will not be removed when the dimension is upgraded during a Package upgrade.
Editor Scripts
On Item Added
This function takes an object (newItem) with properties like id, name, isLeaf, and properties.
The properties field is an array of objects containing propertyId and value.
The function's purpose is likely to handle events when a new item is added to the dimension.
function OnItemAdded(newItem: { id: string, name: string, isLeaf: boolean, properties: Array<{ propertyId: string, value: any }> }): void {
    // Validate the new item's properties
    if (!newItem.id || !newItem.name) {
        console.error("New item must have a valid 'id' and 'name'.");
        return;
    }

    // Check if 'isLeaf' is defined and log its value
    console.log(`New item added. Is leaf: ${newItem.isLeaf ? "Yes" : "No"}`);

    // Log all the properties of the new item
    if (newItem.properties && newItem.properties.length > 0) {
        console.log("Properties of the new item:");
        newItem.properties.forEach(property => {
            console.log(`- Property ID: ${property.propertyId}, Value: ${property.value}`);
        });
    } else {
        console.log("No properties found for the new item.");
    }

    // Example: Add a default property if it's missing
    const defaultPropertyId = "defaultProperty";
    if (!newItem.properties.some(prop => prop.propertyId === defaultPropertyId)) {
        newItem.properties.push({
            propertyId: defaultPropertyId,
            value: "Default Value"
        });
        console.log(`Added default property '${defaultPropertyId}' to the item.`);
    }

    // Perform additional custom logic here
    console.log("New item processing complete:", newItem);
}
Build the dimension and edit dimension data
To build the dimension and edit data, you need to use the Dimension Editor in a Workbook.
- In the Designer, check the “Primary Dimension” in the toolbar. That will make the dimension appear in the Primary dimensions dropdown in the Workbook Dimension Editor.
- Create a new Workbook.
- In the Toolbox, choose the Resources tab and drag/drop the Dimension Editor onto a page.
- Open the Workbook and choose a dimension from the list of available ones.
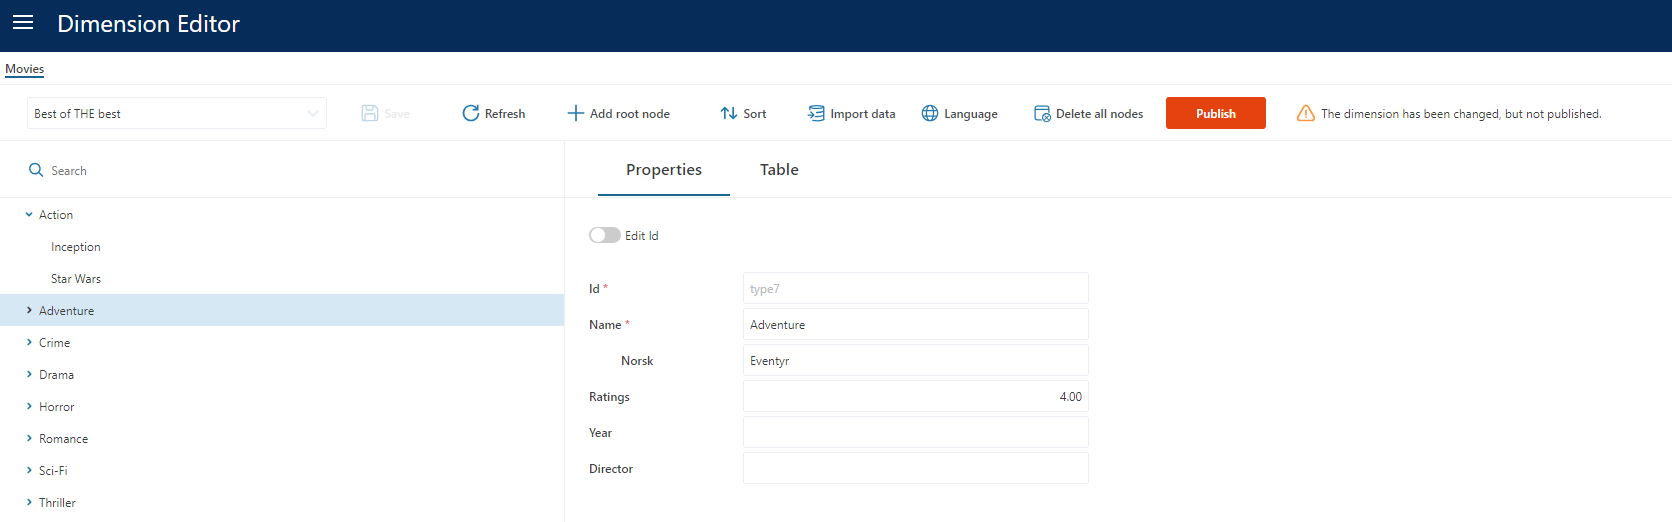
Adding members to a dimension using the tree editor
- To add a new root dimension member, click the “+” button at the top of the dimension tree
- To add a new member as a child of another member, choose “Add” from the action menu of an existing item (hover the item to make the menu trigger appear).
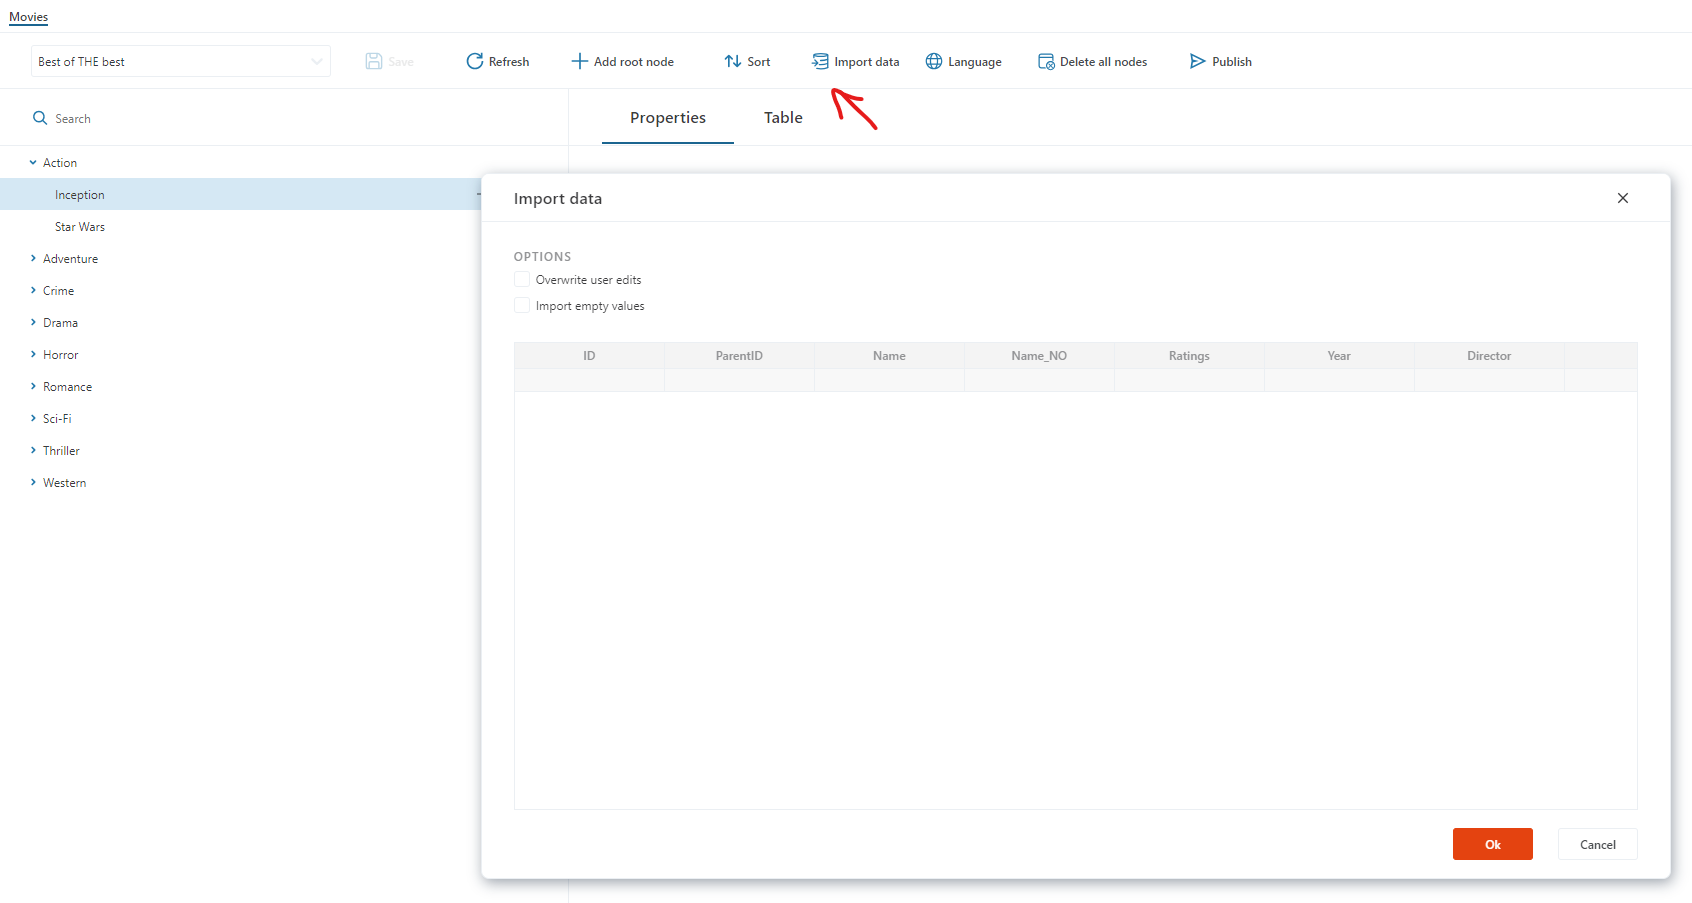
Adding members to a dimension by importing from clipboard/Excel
To import multiple members at the same time, click the Import button at the top of the dimension tree. This will display a table editor that lets you copy/paste data from Excel (or any other tab-delimited file).
Note that you need to use Ctrl-V to paste into the table. You cannot right-click a cell in the table editor.
Organizing dimension members
To organize dimension members in a hierarchical structure, you can do the following:
- Drag/drop nodes between levels.
- Use the action menu which appears when you hover a node to add, delete, cut, paste, and clone members.
- To move multiple items, hold down the Ctrl key while selecting multiple members. Then use the “Cut” and “Paste” options in the action menu to move the items as children to a different member.
- To sort children of an item, open the action menu and choose one of the sorting options available. The sorting options are only available on items in the tree which have children.

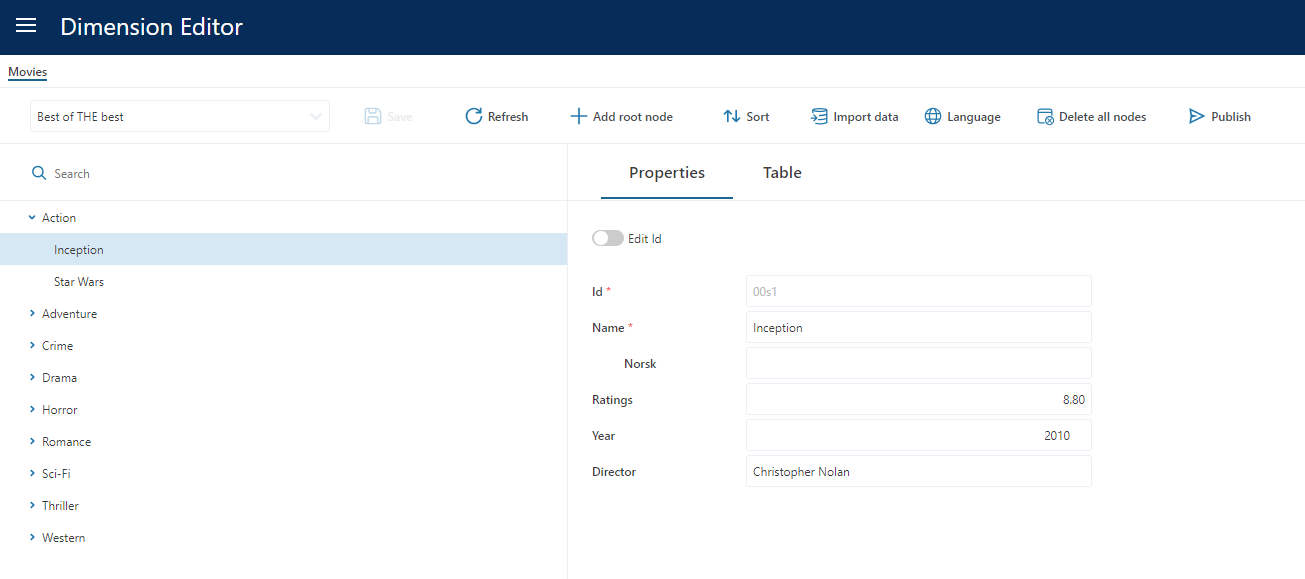
Edit data in table mode
You can edit properties and dimension member names (including translations) using Table Edit mode. That enables users to quickly edit data for multiple dimension members using data grid functionality like drag-copy of cells and copy/paste. While in Table Edit mode, you cannot edit the tree in any way, and you cannot switch back to the Properties tab until you have saved any changes.
Note * When you are in Table Edit mode, you must remember to save your changes before choosing a different dimension member from the tree, or else all your changes are lost.*
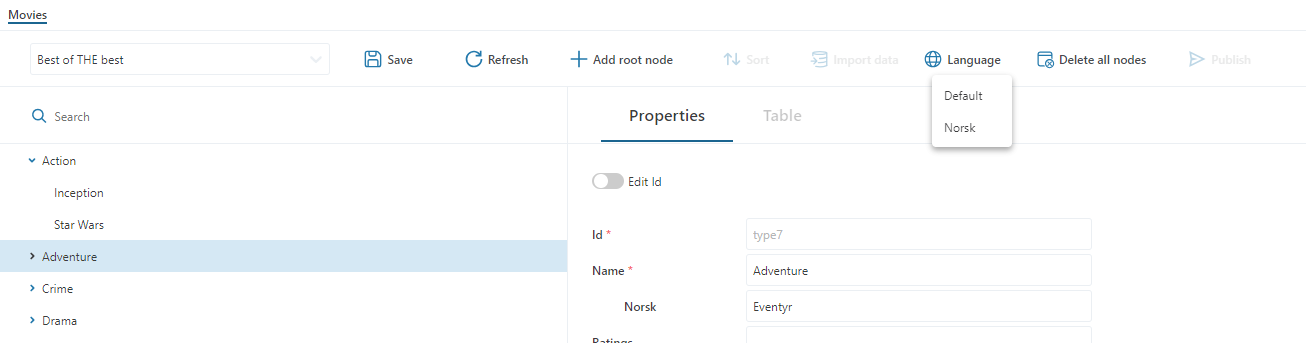
Preview dimension in different languages
If you want to preview how the dimension looks in different languages, use the “Globe” icon at the top of the dimension tree to switch between different languages you have enabled for the dimension.
Publishing a dimension
The changes you make in the Dimension Editor are not fully applied until you have published the changes. That means that you can edit the data and hierarchy, save it, and continue working until you are satisfied with the result. Before applying those changes to the actual data model used by Data Stores, Filters, Tables, etc.
When you publish a dimension, it will always be published to the Solution which owns it. Additionally, you can optionally choose to publish the dimension to other Solutions and Work Process Versions as well. When you choose Solutions and/or Work Process Versions to publish to, the dimension will be published to dimensions in the target Solutions and Work Process Versions having the same name as the dimension being published. When publishing to target