Form
While Package Properties offer a simple way to define static settings, they can be limiting when more dynamic, flexible, or user-specific configuration options are needed. Using a Form provides full flexibility when creating UIs for configuring Work Process versions.
A Form enables
- Building fully customizable UIs for configuring Work Process versions.
- Creating tailored user interfaces that guides the user through the setup.
- Implementing advanced business logic to apply rules and validations.
A common example is a Form where certain fields or options appear or disappear depending on the user’s selections in other fields.
How to create a Form for configuring Work Process versions
When using a Form for Work Process version configuration, there are some steps you need to follow:
- Set a fixed height
- Use synonyms or known fixed table names for SQL data sources
- Add a validation function
- Use context specific variables to get the selected Work Process and Version IDs
Create the Form
The Form must be a child or descendant of the Package it configures. Then, in the Configuration options of the Package, select Form as Option type and select the Form in the field below.

Set fixed height
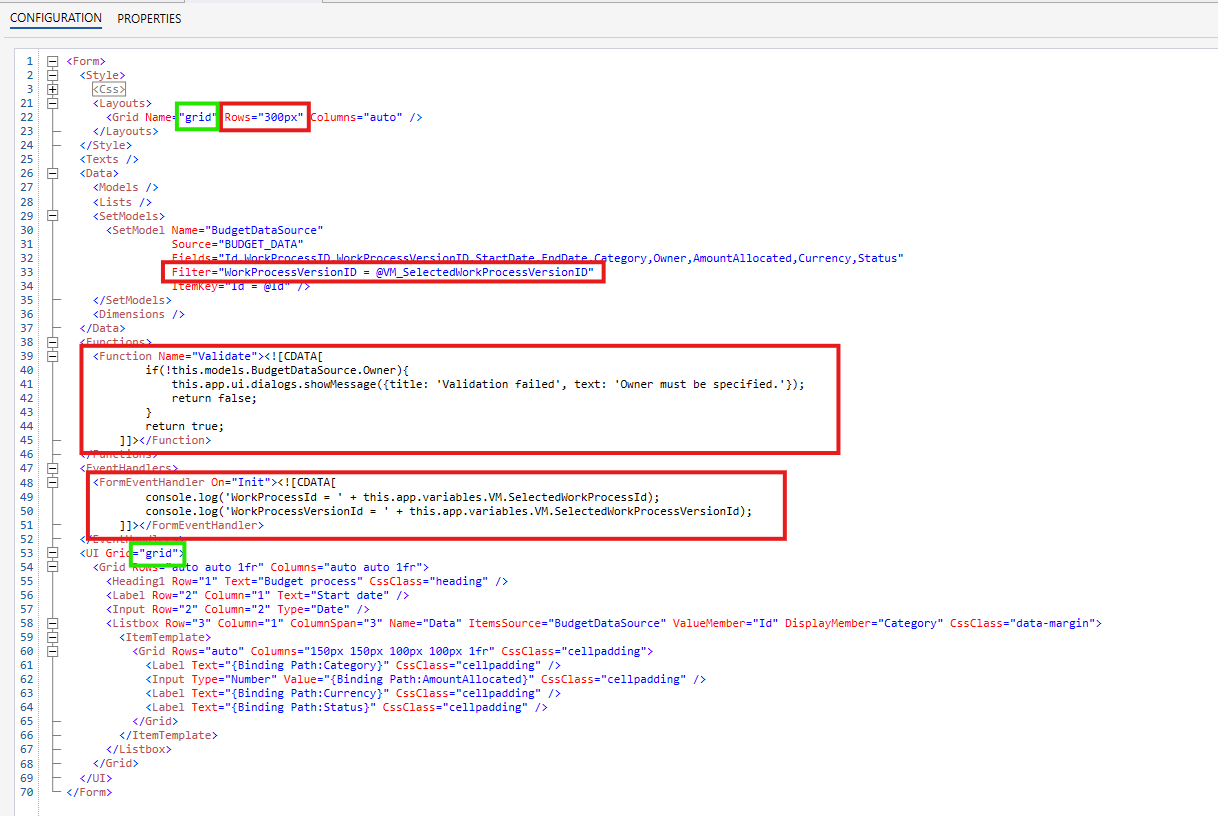
You must set the height of the Root UI grid to a fixed size (for example 300px), or else the Form might not display properly in the Work Process version editor.
Example of styling, using the Layouts-node in the form Setting Rows="[height]px" will give the layout one row with the specific height.
<Form>
 <Layouts>
    <Grid Name="grid" Rows="300px" Columns="auto" />
 </Layouts>
...
 <UI Grid="grid">
    <Grid Rows="auto auto 1fr" Columns="auto auto 1fr">
       ...your UI
    </Grid>
  </UI>
</Form>
Use synonym
Unless the Work Process Version Manger Workbook is in the same Solution as your version setting table(s), you must use synonyms or static table names instead of @Object-directives in SQL queries and SQL data source names.
When specifying a data source, set the Source to a static value, like a synonym
Example
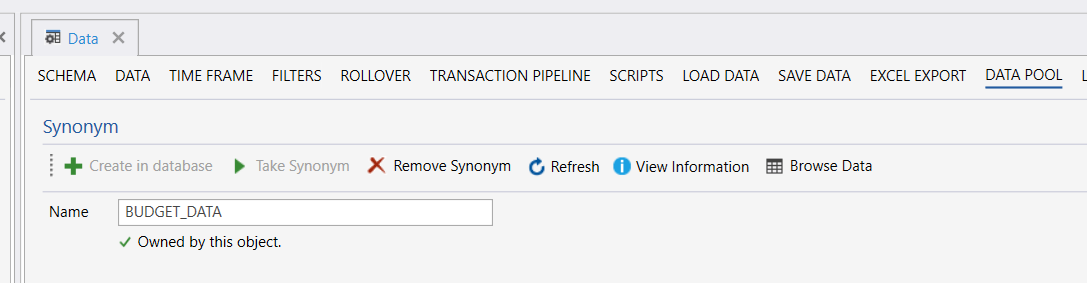
When data is stored in the Solution object named "Data", you may be unable to reference the table using the @Object[Data].DbObjectName directive.
You need to apply a synonym to "Data" and use this as the source. In this example, we have used the synonym "BUDGET_DATA" for our "Data" table, and use this synonym in the SetModel definition.
Note the use of the system-provided @VM_SelectedWorkProcessVersionID SQL parameter which contains the currently selected Work Process version in the Work Process Version Manager.
<SetModel Name="BudgetDataSource"
  Source="BUDGET_DATA"
  Fields="Id,WorkProcessID,WorkProcessVersionID,StartDate,EndDate,Category,Owner,AmountAllocated,Currency,Status"
  Filter="WorkProcessVersionID = @VM_SelectedWorkProcessVersionID"
  ItemKey="Id = @Id"
/>
Example synonym
Caution
When creating a Form for editing version properties, you cannot use @Object-directives in SQL queries or as the model Source, unless the table is in the same Solution as the Work Process Version manager Workbook. Instead, use synonyms to Tables or Data Stores.
-- instead of this:
Source="@Object[Data].DbObjectName"
-- do this (where 'My_Version_Settings' is a synonym to the table where you want to store data)
Source="My_Version_Settings"
<SetModel Name="BudgetDataSource"
  Source="My_Version_Settings"
  Fields="Id,WorkProcessID,WorkProcessVersionID,StartDate,EndDate,Category,Owner,AmountAllocated,Currency,Status"
  Filter="WorkProcessVersionID = @VM_SelectedWorkProcessVersionID"
  ItemKey="Id = @Id"
/>
Validation
If you need to ensure that the user has provided valid input, implement a Function named Validate that returns true or false.
InVision will call this function when the Form loads, and when a user clicks the Change status button in the Version configuration screen.
For example, to prevent the user from deploying a version with invalid configuration, you must implement the Validate function and return true/false based on whether the configuration is valid or not.
Basic example
<Function Name="Validate">
    <![CDATA[
        if(!this.models.VersionSettings.StartDate || this.models.VersionSettings.StartDate.getFullYear() < new Date().getFullYear()){
           // Invalid configuration. StartDate is not set, or is in the past.
           return false;
        }
        return true;
    ]]>
</Function>
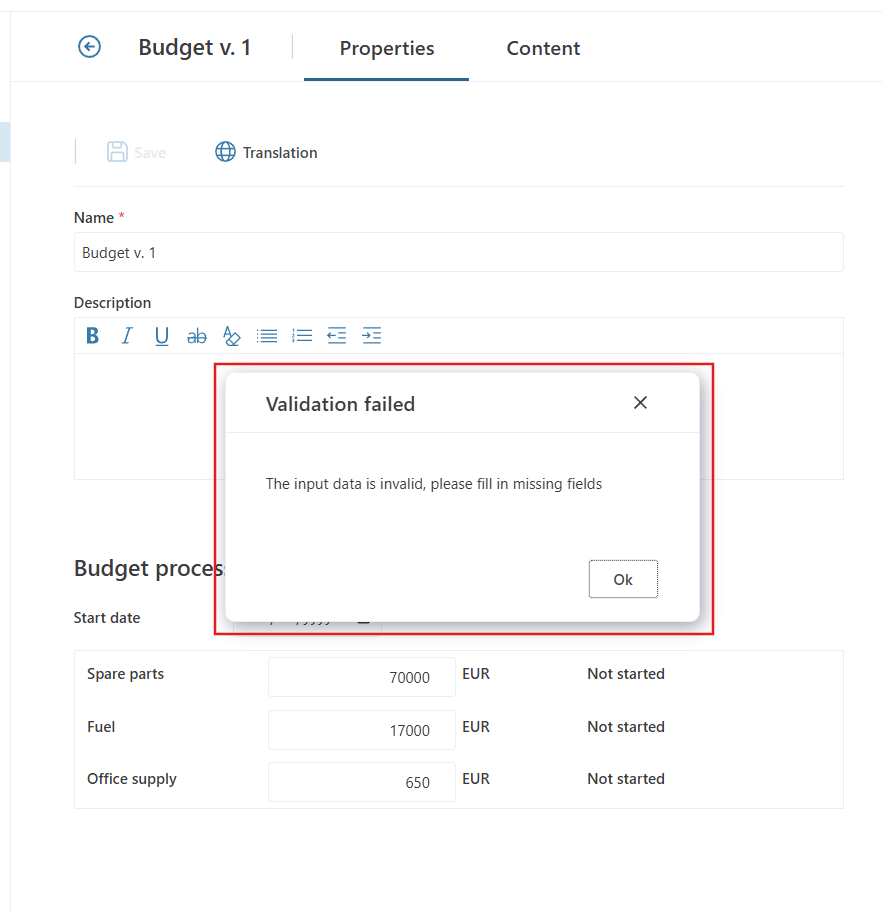
Any visual feedback to the user must also be handled by the Validation function, such as applying red borders around invalid fields, or displaying popup notifications.
Example with UI
<Function Name="Validate">
    <![CDATA[
        if(!this.models.VersionSettings.StartDate || this.models.VersionSettings.StartDate.getFullYear() < new Date().getFullYear()){
           this.app.ui.dialogs.showMessage({title: 'Validation failed',
                                          text: 'Start date in not specified, or in the past.'});

           return false;
        }
        return true<
    ]]>
</Function>
Caution
If the Valdiation function does not exist or is misspelled, InVision will skip the validation step (basically treating it as success).
Variables
When the Form is displayed in a Work Process version editor, you can use the system-provided SelectedWorkProcessId and SelectedWorkProcessVersionId variables to get the IDs of selected Work Process and Version. These variables can be used in JavaScript or as SQL parameters, as shown below.
JavaScript
You can access the variables via the context like this:
this.app.variables.VM.SelectedWorkProcessId
this.app.variables.VM.SelectedWorkProcessVersionId
SQL
@VM_SelectedWorkProcessID
@VM_SelectedWorkProcessVersionID
Example using JavaScript to access the variables
<FormEventHandler On="Init">
  <![CDATA[
      console.log('WorkProcessId = ' + this.app.variables.VM.SelectedWorkProcessId);
      console.log('WorkProcessVersionId = ' + this.app.variables.VM.SelectedWorkProcessVersionId);
   ]]>
</FormEventHandler>
Example using SQL to access variables
<SetModel Name="BudgetDataSource"
      Source="BUDGET_DATA"
      Fields="Id,WorkProcessID,WorkProcessVersionID,StartDate,EndDate,Category,Owner,AmountAllocated,Currency,Status"
      Filter="WorkProcessVersionID = @VM_SelectedWorkProcessVersionID"
      ItemKey="Id = @Id"
/>
Example design
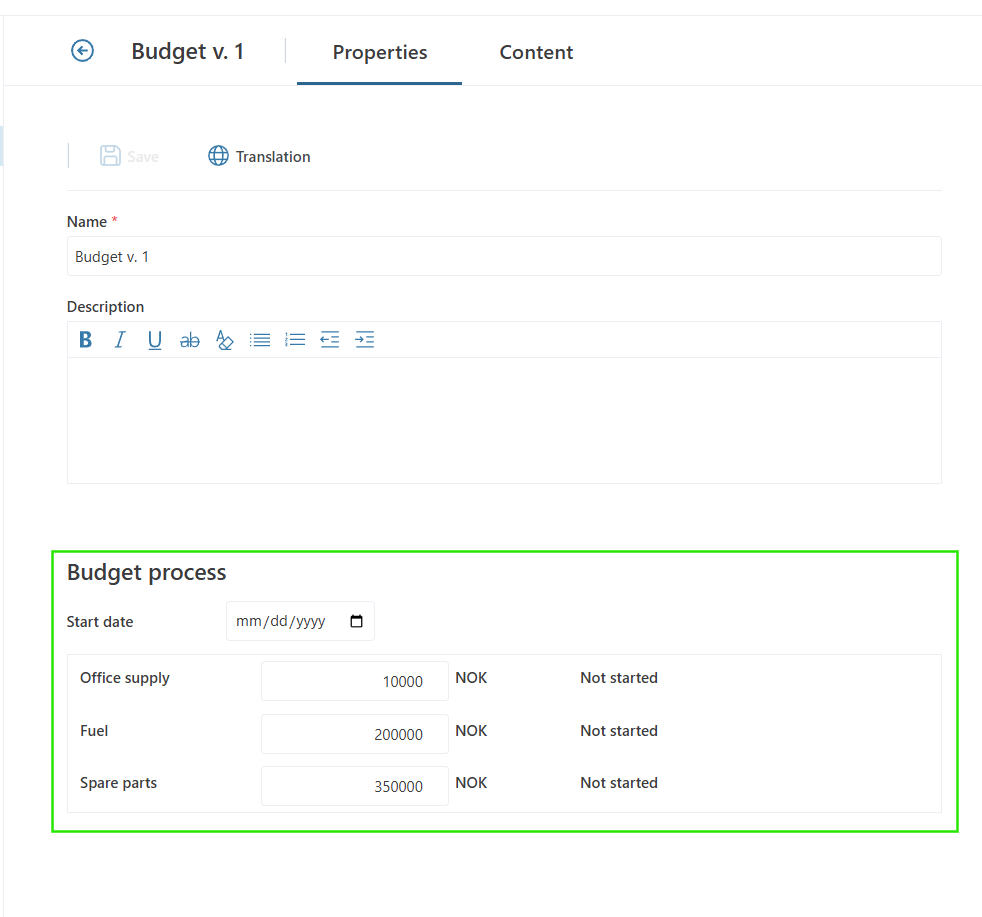
Example result
Example result of failed validation