Data import using CSV (Blob Storage)
This document describes the process of importing data into Profitbase Planner from a CSV file stored in Blob Storage and inserting it into the database.
Best practices for the CSV file
"as the text identifier, ideally all"are removed from text columns.;as the column delimiter- All dates in format yyyy-mm-dd
- Decimals with
.as decimal separator
Transaction files
- The same transaction must not exist in two different files. Overwrite files when uploading the same/updated data.
- Split the files into manageable slices. Year or Year-Month for instance. Depending upon amount of transactions, several legal entities may be sent in the same file.
- Suggested naming convention: gltCompanyIDYearMonth
- Example transactions: gltF001202402.csv
- Example opening balances: gloF001202401.csv
Dimension files
- For smaller (less than 10k rows) dimensions we usually just update all the rows every time.
- For larger dimensions it can be beneficial to see if it can be imported incrementally.
Validate the file before attempting to import
The easiest way to validate the CSV file is downloading the file and opening it in Visual Studio Code with the Rainbow CSV extension installed.
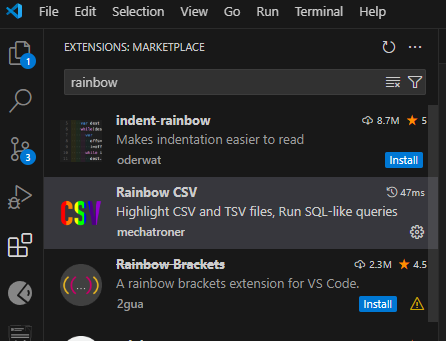
Install Rainbow CSV
Open the extension menu and search for Rainbow.
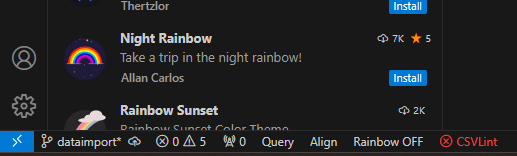
Validate file
Make sure that Rainbow CSV is turned on. If it says Rainbow CSV On at the bottom, click it to turn it on.
If the validation fails shown like this, hover over the red icon and check where it's failing. Click the icon to scan the file again. Remember that cleaning the file is something the sender must do on their side.
Steps to Import Data
For detailed instructions on data import, please refer to the Data Import Guide.