Setup
Overview
This page allows you to configure the Profit and Loss input modules such as Personnel and Account. By configuration means the dimensionality, the use of historical reference columns and so on.
You can also name the modules, control their availability to end-users and how the individual modules are tied to specific report lines of the profit and loss summary report used in the:
Plan overview workbook (Applies to: ![]() Planner 5 or later)
Planner 5 or later)
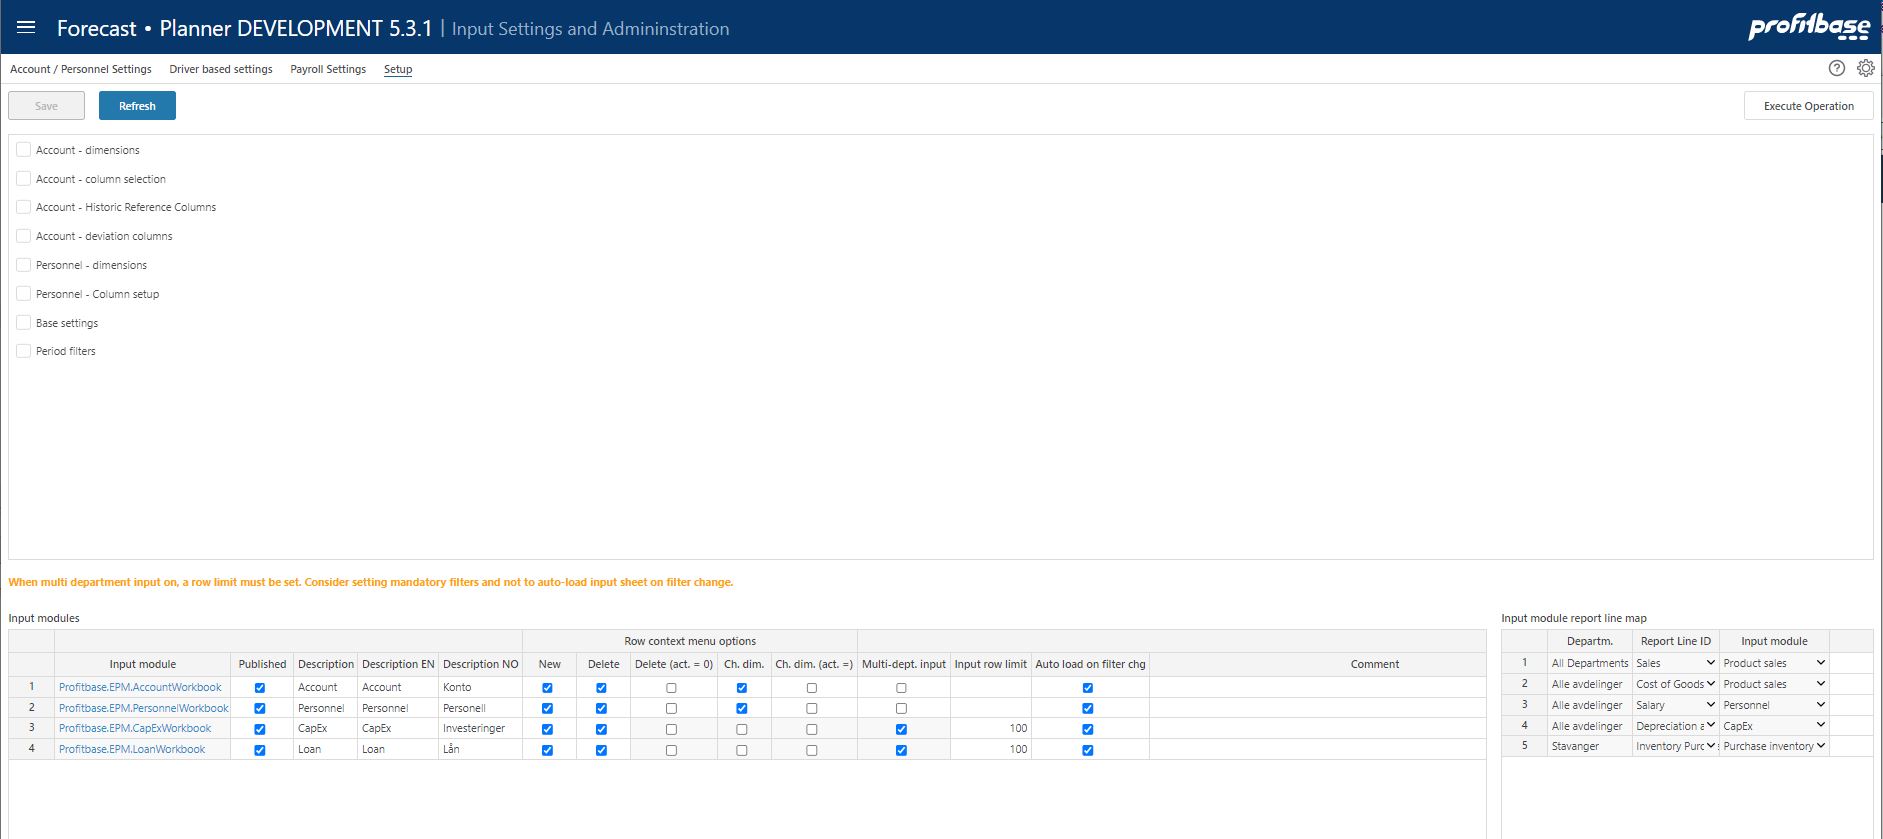
- Module specific configuration tables - main, upper area
With the exception of the "Base settings" table (see description below), this area contains module specific configuration tables.
Please refer to the relevant module document in the "How to's" section below for details. - Module specifics - lower left area
This is where you can set the name of the modules and, by checking/un-checking the "Published" check box, control the availability of the module to end-user. A module with its "Published" check box unchecked is not available to end-users.
Note that the Sales forecast module has a separate setup workbook. - Module to report line mapping - lower right area
This is where you can tie an input module to a specific report line. This tie control which input module is launched when an end-user clicks the report line in either the Budget or Forecast summary.
Please refer to the relevant module document in the "How to's" section below for details.
The Base settings table
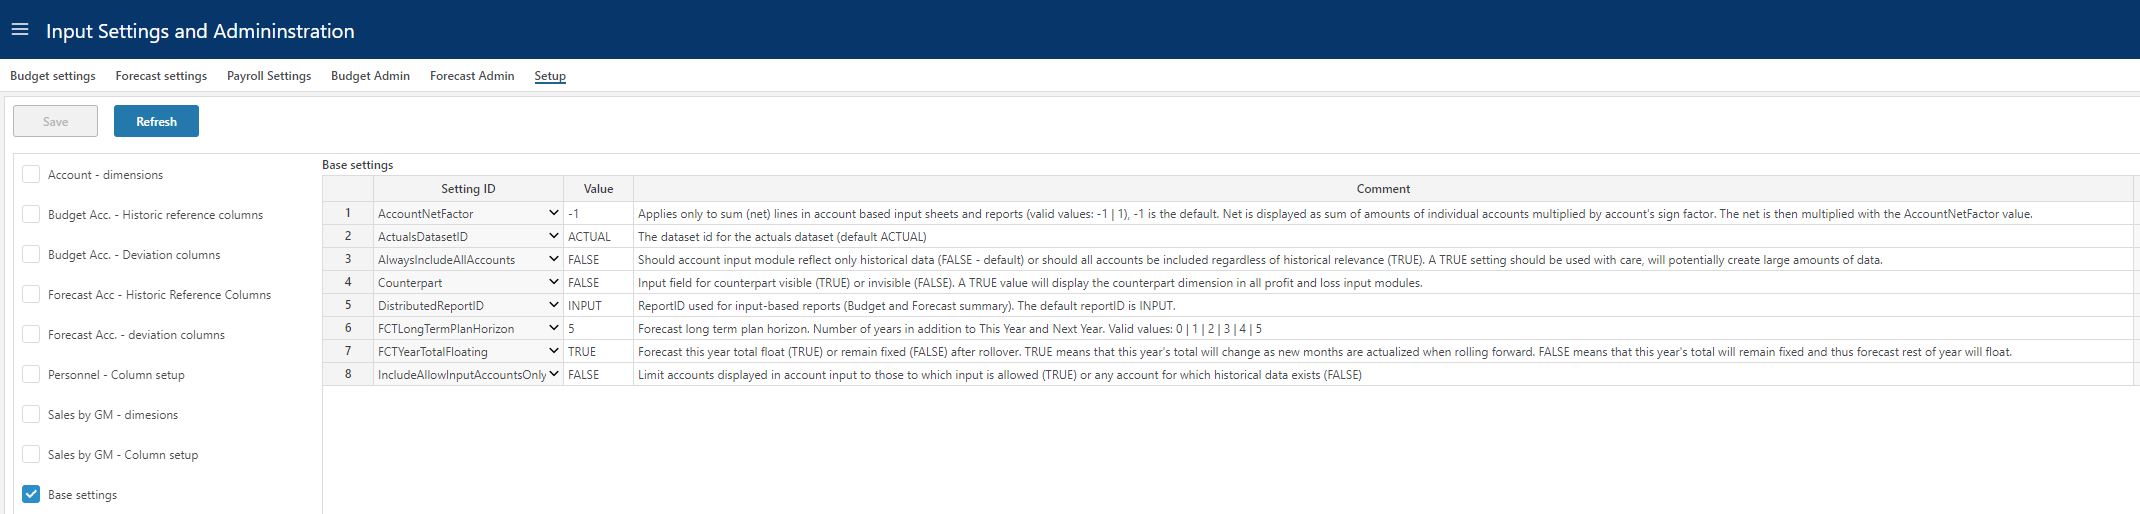
The Base settings table contains settings that span all profit and loss input modules.
Column Descriptions
- Setting ID
The setting identifier.
- Setting ID
The actual value for the setting in question, see corresponding comment for valid options.

The following settings require additional explanation:
FCTYearTotalFloating: In a rolling forecast, this year will consist of an Actuals Year to Date part and a Forecast Rest of Year Part. When rolling forward 1 month, one forecast rest of year month is replaced with an actual year to date month. This setting controls how This year's total value is affected:
- TRUE: This year's total floats (changes) reflects the fact the new actuals year to date month differs from the replaced forecast rest of year month.
- FALSE: This year's total remains the same as it was prior to roll forward. This implies that any difference is spread across the remaining forecast rest of year months.
AccountNetFactor: Applies only to sum (net) lines in account-based input sheets and reports (valid values: -1 | 1), -1 is the default. Net is displayed as sum of amounts of individual accounts multiplied by account's sign factor. The net is then multiplied with the AccountNetFactor value.
What value to choose depends on which account sign is used, how data is input and how one would like to see the net of income and cost.
Default:
Account sign -1 for income accounts, +1 for cost accounts.
All normal input positive, income and cost.
AccountNetFact -1
These defaults will render a net profit as a positive number.
ExternalLedgerActualDatasetID:
The default is that all processes import the actual dataset from the external ledger.
In special cases, however, different processes may use different sets of actual data.
For this to take place, the ExternalLedgerActualDatasetID property can be used to point to the specific actual dataset id to be used in the current version.
NOTE: in such scenarios, no set should be named Actual in the external source. Name them individually as ActualSRS, ActualKontant and so on. If you have one set named Actual and one named ActualSRS in the external source both will be mapped to Actual given the above mapping and that is not what you want.
- Comment ID
Short description of the individual setting.
How to`s
Applies to: ![]() Planner 6.2 or later
Planner 6.2 or later
Configure the Account module
Configure the Personnel module
Configure the Driver based module
Configure the CapEx module
Configure the Loan module
Applies to: ![]() Planner 6.1
Planner 6.1
Configure the Account module
Configure the Personnel module
Configure the Driver based module
Configure the CapEx module
Configure the Loan module