Workbook Menu
The Workbook Menu enables users to quickly explore and navigate between the different Workbooks that they have access to. Workbooks belonging to Work Processes are automatically grouped by the Work Process and version they belong to.
The system comes with a default menu, but you can create additional menus if you want to separate different work processes or business solutions. For example, if you are a manager of a production facility, you will have both operational and administrative responsibilities.
If you have a large custom solution for production management, you might or might not want all the Workbooks from your production management app in the same menu as your financial planning app. With the option to create multiple Workbook menus, customers get the option to decide how they want their identities to be able to navigate between all the Workbooks they have access to. Some would like to have everything available on the same menu, while others like to keep things focused.
Structuring
A menu can be structured with folders, Workbooks, and Work Processes using the InVision Designer.
Folders are typically used for grouping Workbooks that logically belong together. Folders can have any type of children, so you can use folders to create menu hierarchies as deep as you want (although we don't recommend creating it more than a few levels deep).
Workbooks can be placed at the root level of a menu, or as children of a folder. Workbooks cannot have children of their own.
Note
Workbook can only belong to a single menu.
Work Processes can be placed in a menu using either the InVision Designer or the Work Process configuration screen in a Workbook. Work Processes can be placed at the root level or in folders. Versions and Workbooks that belong to a Work Process is automatically displayed in the menu.
Work Processes should always be added to the default system menu. When using the InVision Designer you can place Work Processes in custom menus, but when using the web interface, all Work Processes will automatically be placed in the system menu.
A Workbook will appear in a menu if the following holds true:
- The current user has been granted access to the Workbook
- The Workbook is marked as Published in the Workbook editor
- The Workbook has been explicitly added to a menu, or the Workbook belongs to a Work Process with a Version that is either in the Deployed, Open or Closed state
- While a Work Process Version is in the Deployed state, only Work Process administrators will have access to the Workbook
Example
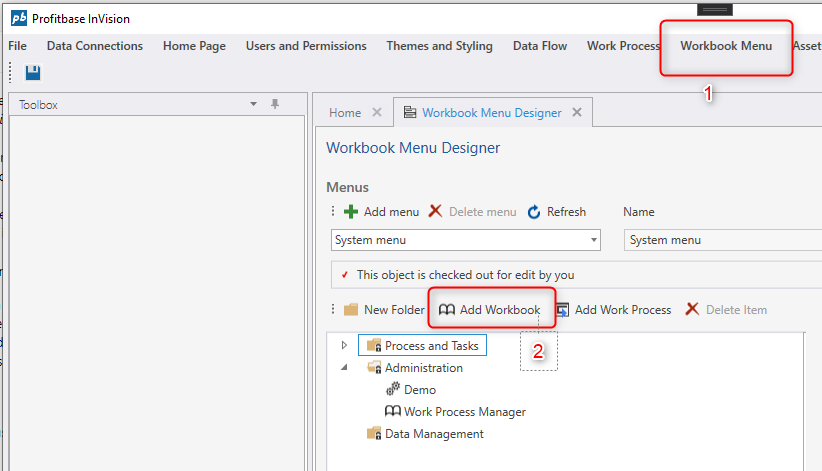
Placing a Workbook in a menu using the InVision Designer:
- In the InVision Designer, from the application menu, choose Workbook Menu -> Workbook Menu Designer,
- Choose the System Menu (or create a custom menu),
- Click Add Workbook or right click a folder to add a Workbook,
- If you want to reposition the Workbook, drag and drop it to the new location.
Example
Placing a Work Process in the menu using the Work Process configuration screen:
- Open the Work Process management Workbook,
- Find the Work Process and choose Configuration,
- Click the Position in the menu link,
- In the popup, drag and drop the Work Process to the desired position.
