Stepper
The Stepper Control lets you organize content in tabs, and each tab can host a single Subscreen.
You can drag and drop a Stepper Control onto a page from the UI Elements toolbox folder.
Steps
To add Steps, click Edit Steps in the Property pane.
Using the Steps editor, you can manage stepps by setting the header texts and contents.
To set the contents of a step, choose a Subscreen from the Contents dropdown.
Note
Subscreen can only be used once, so if you don’t see a Subscreen in the dropdown, this means that it is already in use somewhere else in the Workbook.
Steps properties:
Header
The text displayed as the step header.
Header Expression
A C# expression returning a string.
Content
The subscreen to display as the step content.
Stepper API
You can use the Stepper API to control different states of the Steps dynamically, such as the header texts and enabled/disabled states.
The Stepper API can be called from the Execute Expression, Set Step Is Completed or Go To Step action of the Stepper.
Actions
Set Step Is Completed(...)
Checks out the step when completed.
Arguments("Step1", true)
Go To Step(...)
Switches to the selected step.
Arguments("Step3")
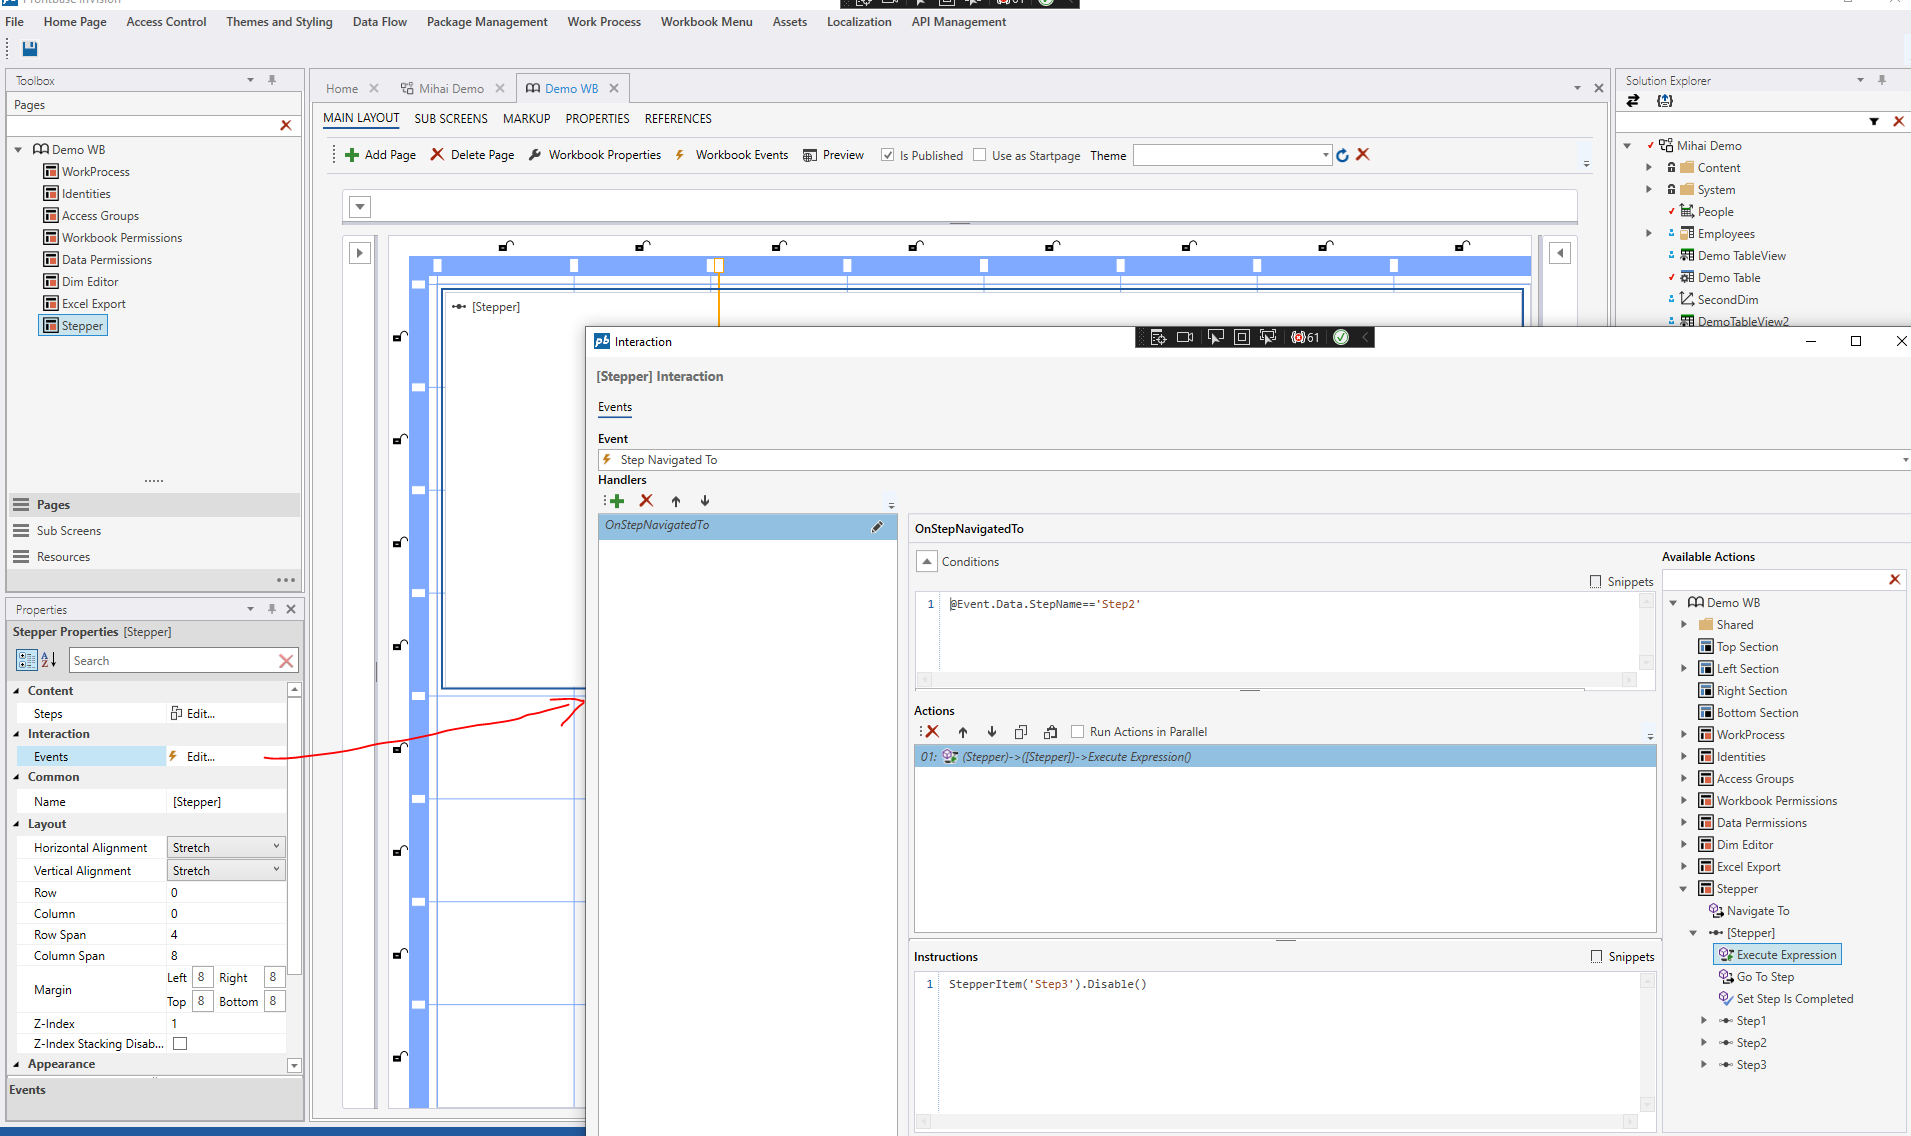
Events
Step Navigated To
Executes an expression when the conditions are met.
Example
This example shows which condition needs to be met to disable Step3.
Condition
@Event.Data.StepName=='Step2'
Instruction
StepperItem("Step3").Disable()
StepperItem(...)
Returns a reference to a Stepper instance which has the following API.
StepperItem("step name")
SetHeader(...)
Sets the header of a step.
SetHeader(text : string | Eaze expression)
Example
This example shows how to change the header of the Step named “Step1” from the Execute Expression action of a Stepper:
StepperItem("Step1").SetHeader("My Header");
SetHeaderSuffix(...)
Adds a suffix to the original tab header. The optional whitespaceBetween enables you to determine whether you want whitespace between the base header text and the suffix (the default is true).
SetHeaderSuffix(text : string | Eaze expression[, whitespaceBetween | boolean = true])
Example
This example shows how to set a suffix of the Tab named “Tab1” from the Execute Expression action of a Stepper
StepperItem("Tab1").SetHeaderSuffix("My suffix");
ResetHeader(...)
Resets the header to its original value.
Example
This example shows how to reset the text of the Step named “Step1” to its original state from the Execute Expression action of a Stepper:
StepperItem("Step1").ResetHeader();
Disable(...)
Lets you specify whether a tab is disabled or not.
Disable([disable:boolean = true])
Example
This example shows how to disable the Step named “Step1” from the Execute Expression action of a Stepper:
StepperItem("Stepr1").Disable();
You can also call Disable(…) by passing a boolean value indicating whether the Step should be disabled or not, which basically means you can set the disabled state.
StepperItem("Step1").Disable(false); // Since we’re passing false, Enables the Step.
Enable(...)
Lets you specify whether a step is enabled or not.
Enable([enable:boolean = true])
Example
This example shows how to enable the Step named “Step1” from the Execute Expression action of a Stepper:
StepperItem("Step1").Enable();
You can also call call Enable(…) by passing a boolean value indicating whether the Step should be enabled or not, which basically means you can set the enabled state.
StepperItem("Step1").Enable(false); // Since we’re passing false, Disables the Step.