Account details
Overview
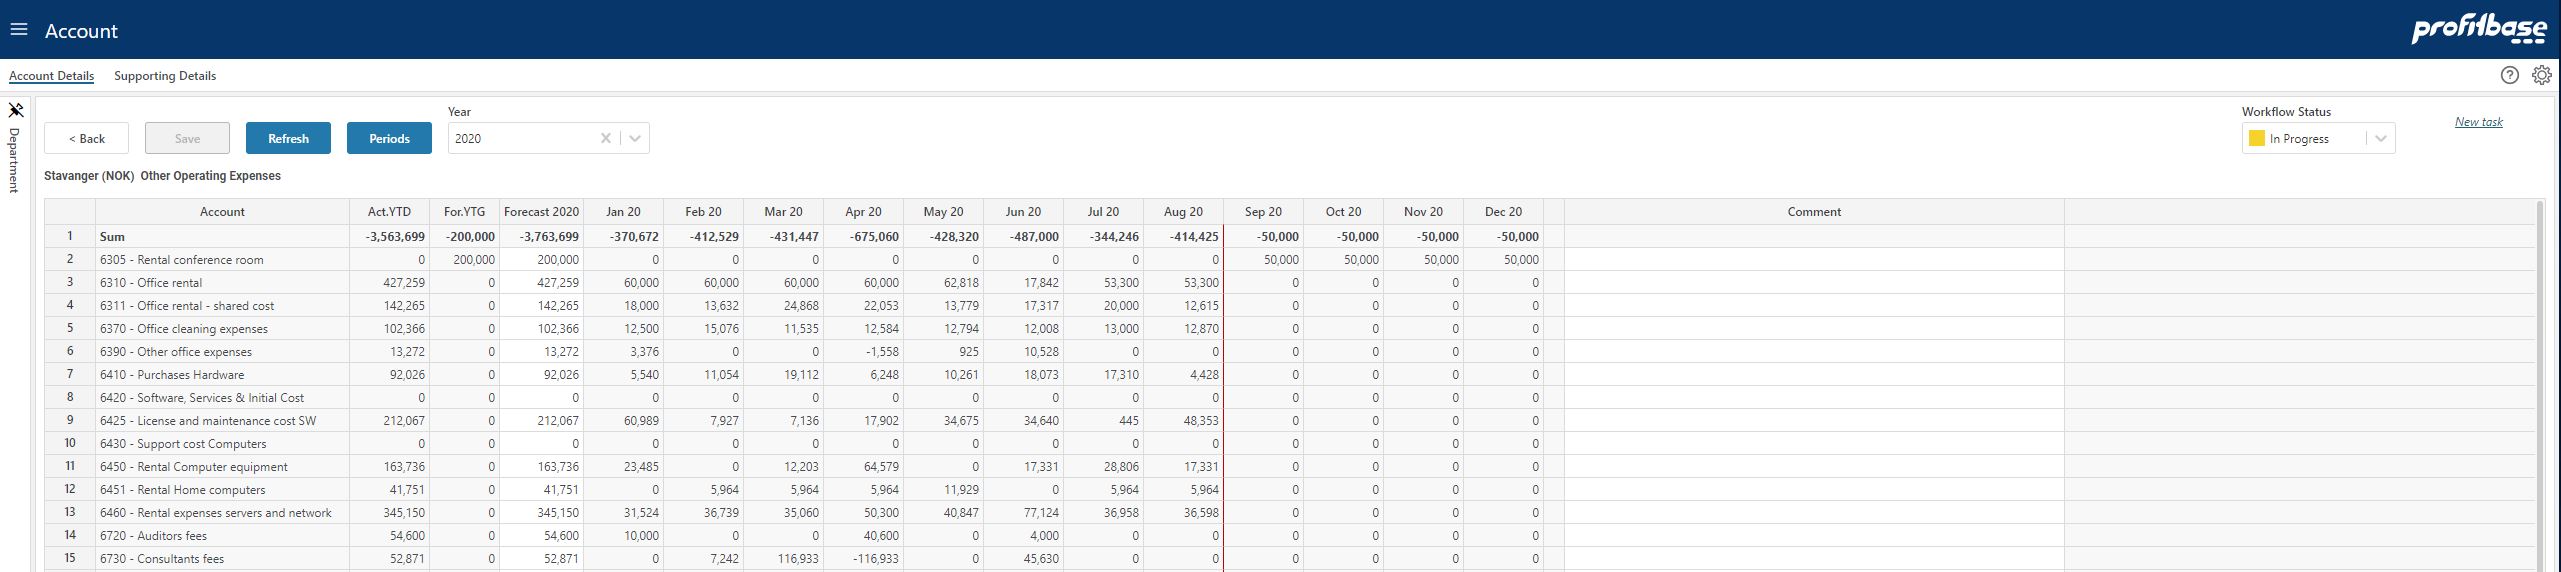
This is the input page of the Account module and is where any detailed planning per account takes place.
- Back button
This button is active when the module is launched from the Budget or Forecast summary (versions 4.x) and Plan overview (from version 5) workbook. Clicking the Back button will launch the summary workbook in the same browser window. If there are unsaved changes made in the Account module, a prompt will appear requesting confirmation. - Periods button
The Periods button toggles the input mode between a year-total input and a periodic input. Any year-total input will automatically be distributed to the periods. Input made to periods will automatically be summed to the year total. Note that for forecasting, the current year (this year) will consist of a set of actual periods that are read only and a set of plan periods that are editable. The cut off between actuals and plan is visualized with a red vertical line as show in the example. - Supporting details page
The supporting details page displays the plan data produced from the input made in the account module and may contain accounts that are not input directly but calculated based on the input. Examples are social cost such as vacation pay, employer tax, etc. - Workflow
The workflow enables you to set the state of the plan for the department selected. Setting the state to Finished will by default disable any further input (depends on user's access level). - Attachment button
The attachment button will display the number of attachments associated with this input page in the current filter context. The current filter context is the selection made in the organizational filter (leftmost section) and the optional filters that are found in the rightmost section (subject to configuration).
To add a new attachment, click the attachment button and drag-then-drop the attachment from the file system onto the drop zone in the attachment dialogue.
To delete an attachment, click the attachment button, select the attachment and the click the Delete button (bin icon) within the attachment dialogue.
- New task link
Clicking the New task link enables the creation of a task associated with the Account module. See "How to create a new task" below.
- Filters section(s) left and right
In the left section, the mandatory Department filter is displayed. The content of this filter is normally access controlled. In the right section, additional context filters (Account, Activity, Project, depending on the solution configuration) are displayed. Make filter selections to narrow down the data displayed. From Planner 5.3 onwards, a Net filters check box is available that allows you to narrow down the filter member to those available in the data grid.
Video
Column Descriptions
Account
The account to which the input will be associated. If historical reference columns are included, the input sheet for a particular department will be pre-filled with the accounts that the department historically have used.
New accounts may be added by hovering the mouse over the input sheet and do a mouse right-click to reveal a menu and select one of the "Insert new row" options. Doing so will insert a new row, and the Account column of the new row will contain a drop-down selector that is used to select the appropriate account.
Depending on the solution configuration, a number of additional dimensions may also be included (not shown in the example).Historic reference columns ("Act. YTD" in the example)
One or more historical reference columns.
Note that in a forecast, the actuals year-to-date will always be included as it is an integral part of this year's forecast.Year-total ("Forecast 2020" in the example above)
Input field that allows for input of the year-total planned. The Periods button will toggle the input mode between the year-total and periodic input.
Note that in a forecast, this year-total will include an actuals year-to-date part. From Planner version 5.3 onwards, you can right-click an input cell and select Validate financial simulation to see the financial impact of the input value. Note that this value is first distributed across one or more periods resulting in multiple source rows for the financial simulation. The results is presented in a separate pop-up window.Period columns for selected year ("Jan 20" to "Dec 20" in the example)
Input fields corresponding to specific periods. The Periods button will toggle the input mode between the year-total and periodic input.
Note that in a forecast, certain periods will represent actuals if this year is selected. The actuals periods are not editable.Comment
Input field enabling textual comments to be associated with the input for a specific line.