Table Explorer
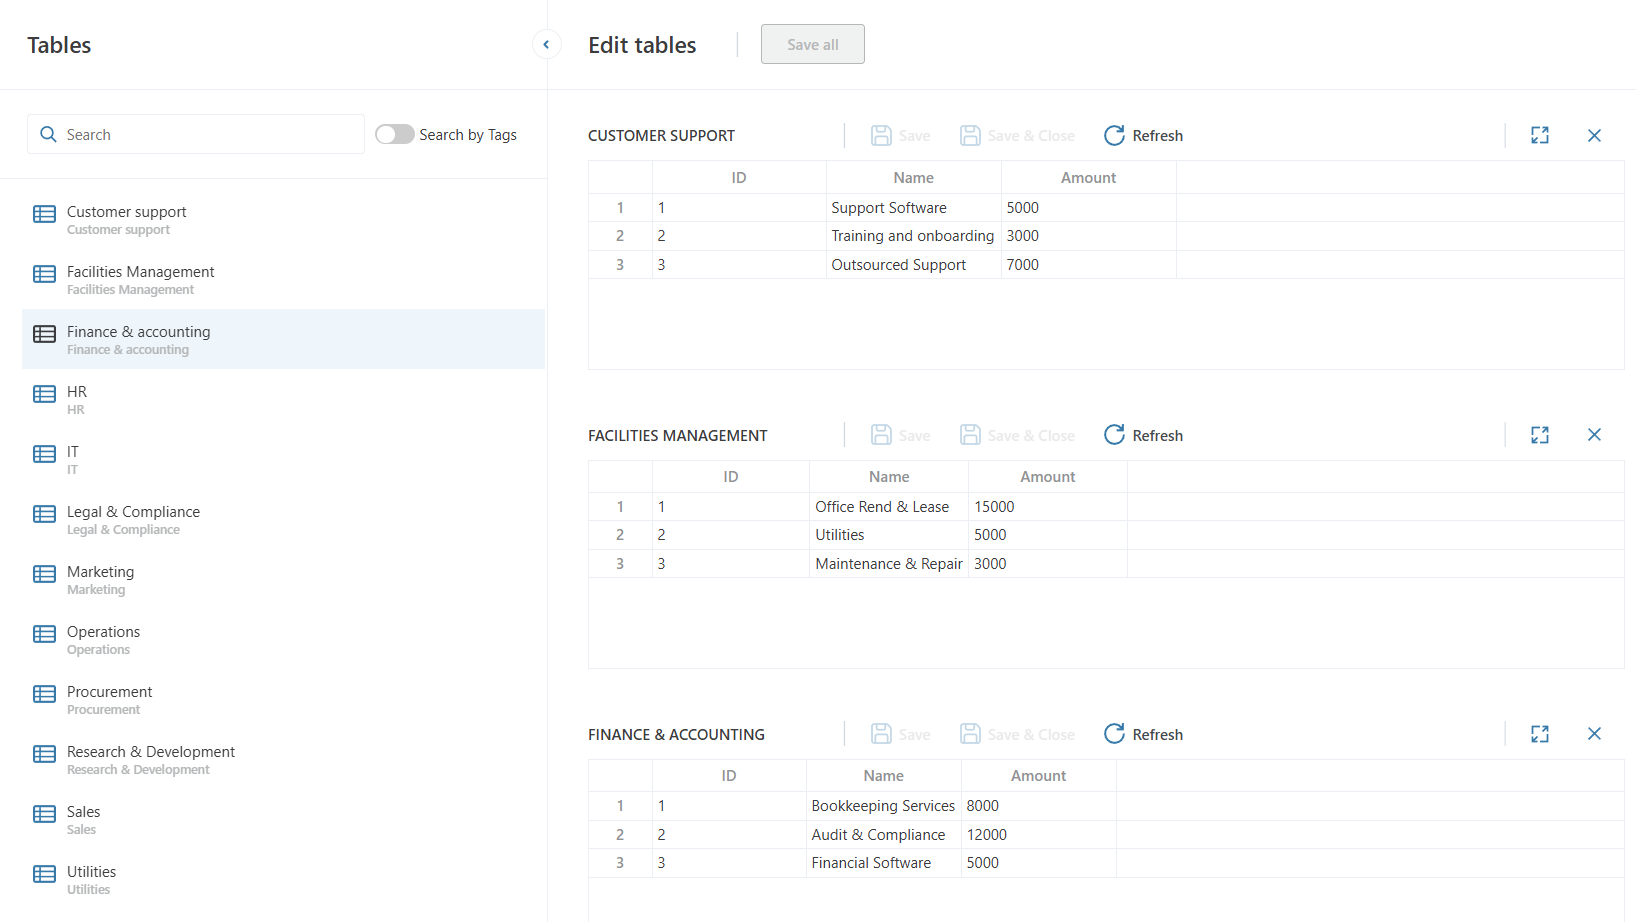
The Table Explorer lets developers group tables by business domains so users can quickly discover and edit related data in a single UI instead of switching between multiple tabs, pages or Workbooks.
Getting started
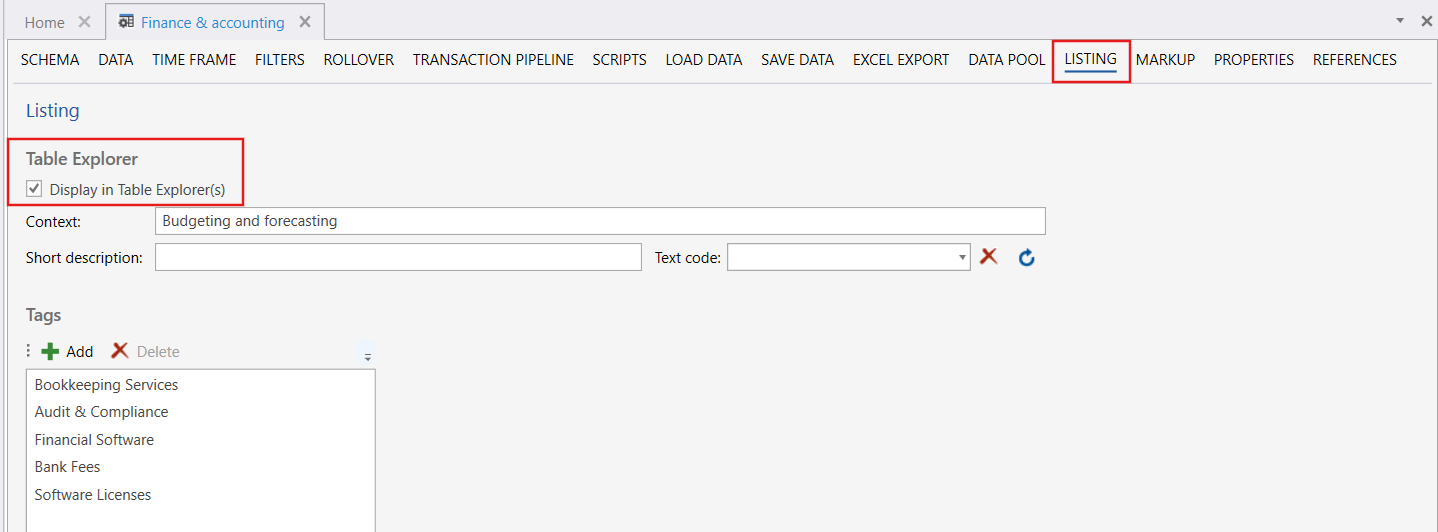
To display a Table in a Table Explorer
- Open a table for edit in the InVision Designer.
- Switch to the Listing tab.
- Check Display in Table Explorer(s)
- Add a Table Explorer component to a Workbook (in the same Solution)
Properties
| Name | Type | Description |
|---|---|---|
| Display in Table Explorer(s) | Optional | Specifies whether the Table appears in Table Explorer(s) in Workbooks. |
| Context | Optional | A filter property used to categorize the table, enabling the table to appear in only select Table Explorers. For example, you can add a context string, Budgeting and forecasting, which makes it possible to display this table in only Table Explores having a matching Context filter (Budgeting and forecasting).This keyword acts as a possible filter value for the Context filter. See also Context and context filtering |
| Short Description | Optional | Shown as a subtitle for the table in the Table Explorer. This text can be localized using the associated "Text code". |
| Tags | Required | At least one tag is required. Tags help categorize and filter tables. Each tag supports localization via the provided "Text code". A table can have multiple tags. |
Display in a Workbook
To display a Table Explorer in a Workbook, open the Workbook designer and drag - drop a Table Explorer component from the toolbox onto a page.
Read more
Choosing which tables to display
Tables can be marked with a context, allowing the Table Explorer to filter and display only the relevant ones.
Read more
Searching for a table
You can quickly find a table by searching its name, short description, or by using the 'Search by Tags' option to filter by specific tags.
Read more
Editing data
You can edit the table data when it is opened.
Read more
Filtering data
You can filter selected tables using the SetParamValue() function in the Execute Expression action for the Table Explorer component.
Read more