Track events and data, and raise alerts when action is needed
The goal is to enable workers to focus on value-adding tasks, rather than needlessly checking reports when everything is running smoothly. The system will notify them only if attention is required.
You can use Hypergene Flow and Hypergene InVision to monitor, analyze and make data-driven decisions through live integrations with APIs, services, and databases.
Hypergene Flow is used for building data integrations and business rules engines for data analysis, while Hypergene InVision enables building data models and user interfaces. The tools are fully integrated, and offers a seamless low-code experience for building business process automation solutions.
Example - Monitoring production line data
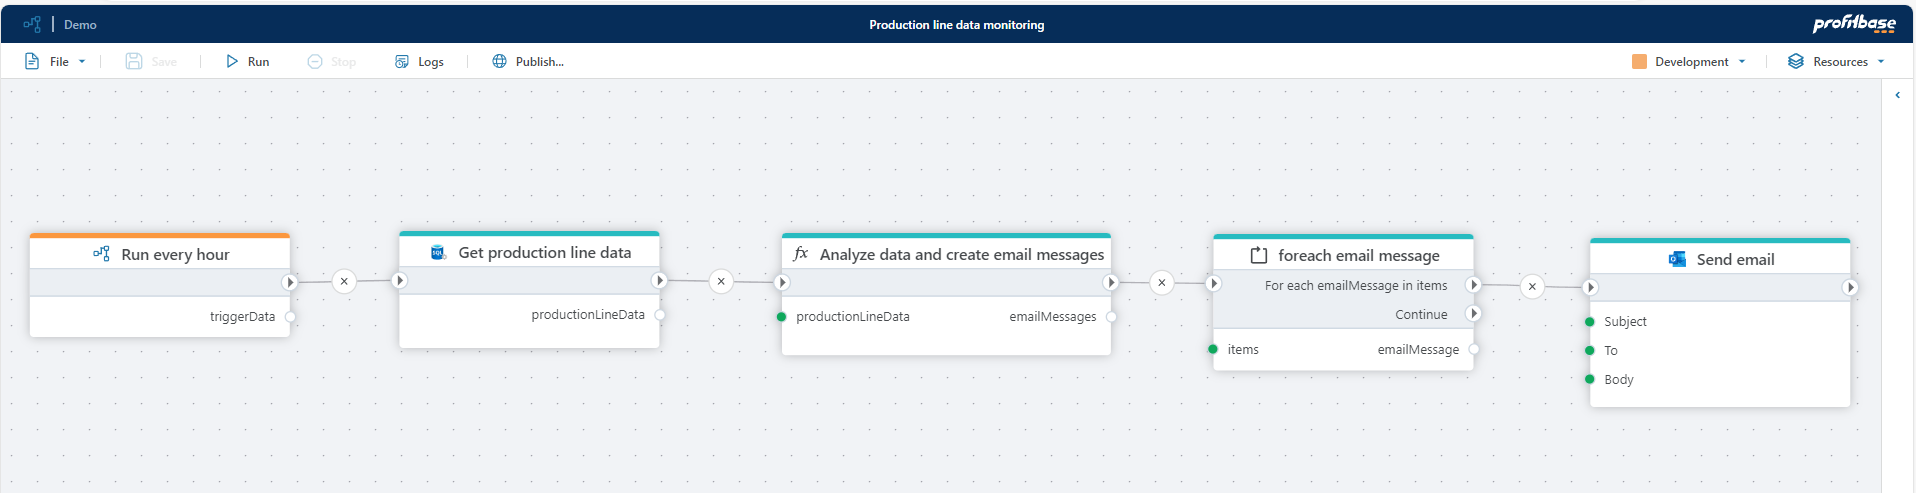
In this example, we'll build a Flow that continually monitors production line data and sends email notifications when orders are at risk of missing delivery dates.
We'll assume that all relevant data is stored in a central repository or data platform (e.g., Microsoft Fabric, Snowflake, Databricks), as this is common for organizations that centralize operational data for analysis and reporting. If you don't have such a system, you can use Profitbase for this as well.
The Flow contains the following steps:
- Run on a schedule: Use a Schedule trigger to make the Flow run repeatedly on a schedule, for example hourly or nightly.
- Fetch production data: Execute a SQL query against the database that returns the relevant production data, including the backlog, progress, estimated production time and delivery dates of items.
- Analyze the production data: Use a Function to define the business logic that identifies which production items are in danger of missing milestones or delivery dates. The Function returns a list of email messages we'll send to users that needs to take action. The emails contains instructions and links to reports in Power BI, Hypergene InVision or other reporting tools
- Notify users: Notify users by sending the emails created in step 3.